Hello!
Last week we started adding watercolor paints to the jar and leaves of this sketch.
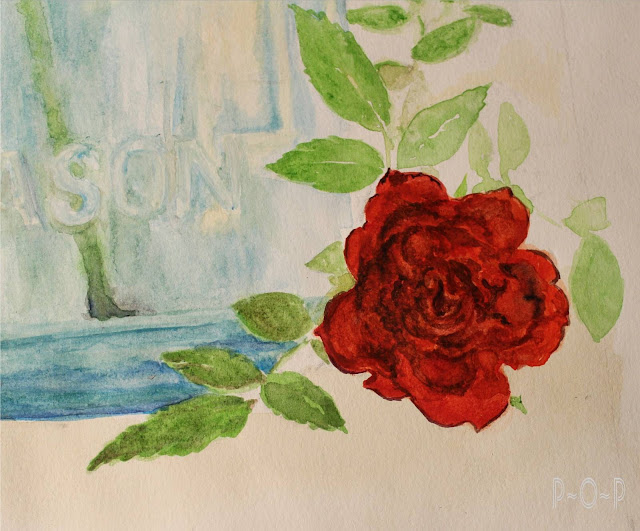
This week, let's paint the rose.
I started with a very watered down red over the whole flower.
I let it dry.
I then started on the outside with some dark edging.
Sometimes I start flowers from the center.
I think whatever one feels comfortable with starting is the key.
I continued adding the edging: a watered down wider edge
as well as a darker more distinct thinner line where I saw it in the photo.
This process continued in toward the middle.
At a certain point, I find I have to add the center so I can make sure that all the details are being put in the right places.
Once the whole rose was painted in, it looked a bit dark and flat to me.
The great thing about watercolors is that some of the color can be pulled up using a wet paper towel.
I was then able to repaint the detail with a little less color.
It should be noted that this should be done carefully and with limited attempts because the paper can begin to disintegrate with too much rubbing up.
I am sure there are many ways to paint a rose:
if only there was a way to paint the incredible scent of it, as well,
but, of course, that is what makes the real thing so wonderful.
Next week, we will finish this piece by going over the steps used to shadow the jar and rose.
Thank you for stopping by.
Be sure to pick up a brush and add some color to the canvases in your own life.
To see the beginning of this painting click:
Art Lesson: Watercolors Painting a Blue Canning Jar
To see the conclusion of this painting click:
Art Lesson: Shadows with Watercolor
Sharing at these blog parties:
Funkyjunkinteriors.net
Shabbynest.blogspot.com
Sixsistersstuff.com


Amazing!!
ReplyDelete