Friday, February 28, 2014

Longwood Gardens: A Vacation of Beauty.


 Today I am taking a break from painting ideas to revisit a favorite place.

Kelly's Korner is having a blog party of sharing favorite vacation places.
Living on a farm limits us from taking many over night vacation trips,
so we usually find enjoyable day trips instead.

My favorite day trip vacation is definitely the Longwood Gardens.

I would love to spend a good amount of time there painting the beautiful plants and landscaping.


The topiary gardens are impressive.


There are so many great places to walk:


 many gardens have structures and sculptures that take one to another era.


Wouldn't she be fun to sketch?


 We visited the gardens in the fall and at Christmas time.
 Both visits had beautiful sights.
Fall was a perfect time to stroll and see the colors.


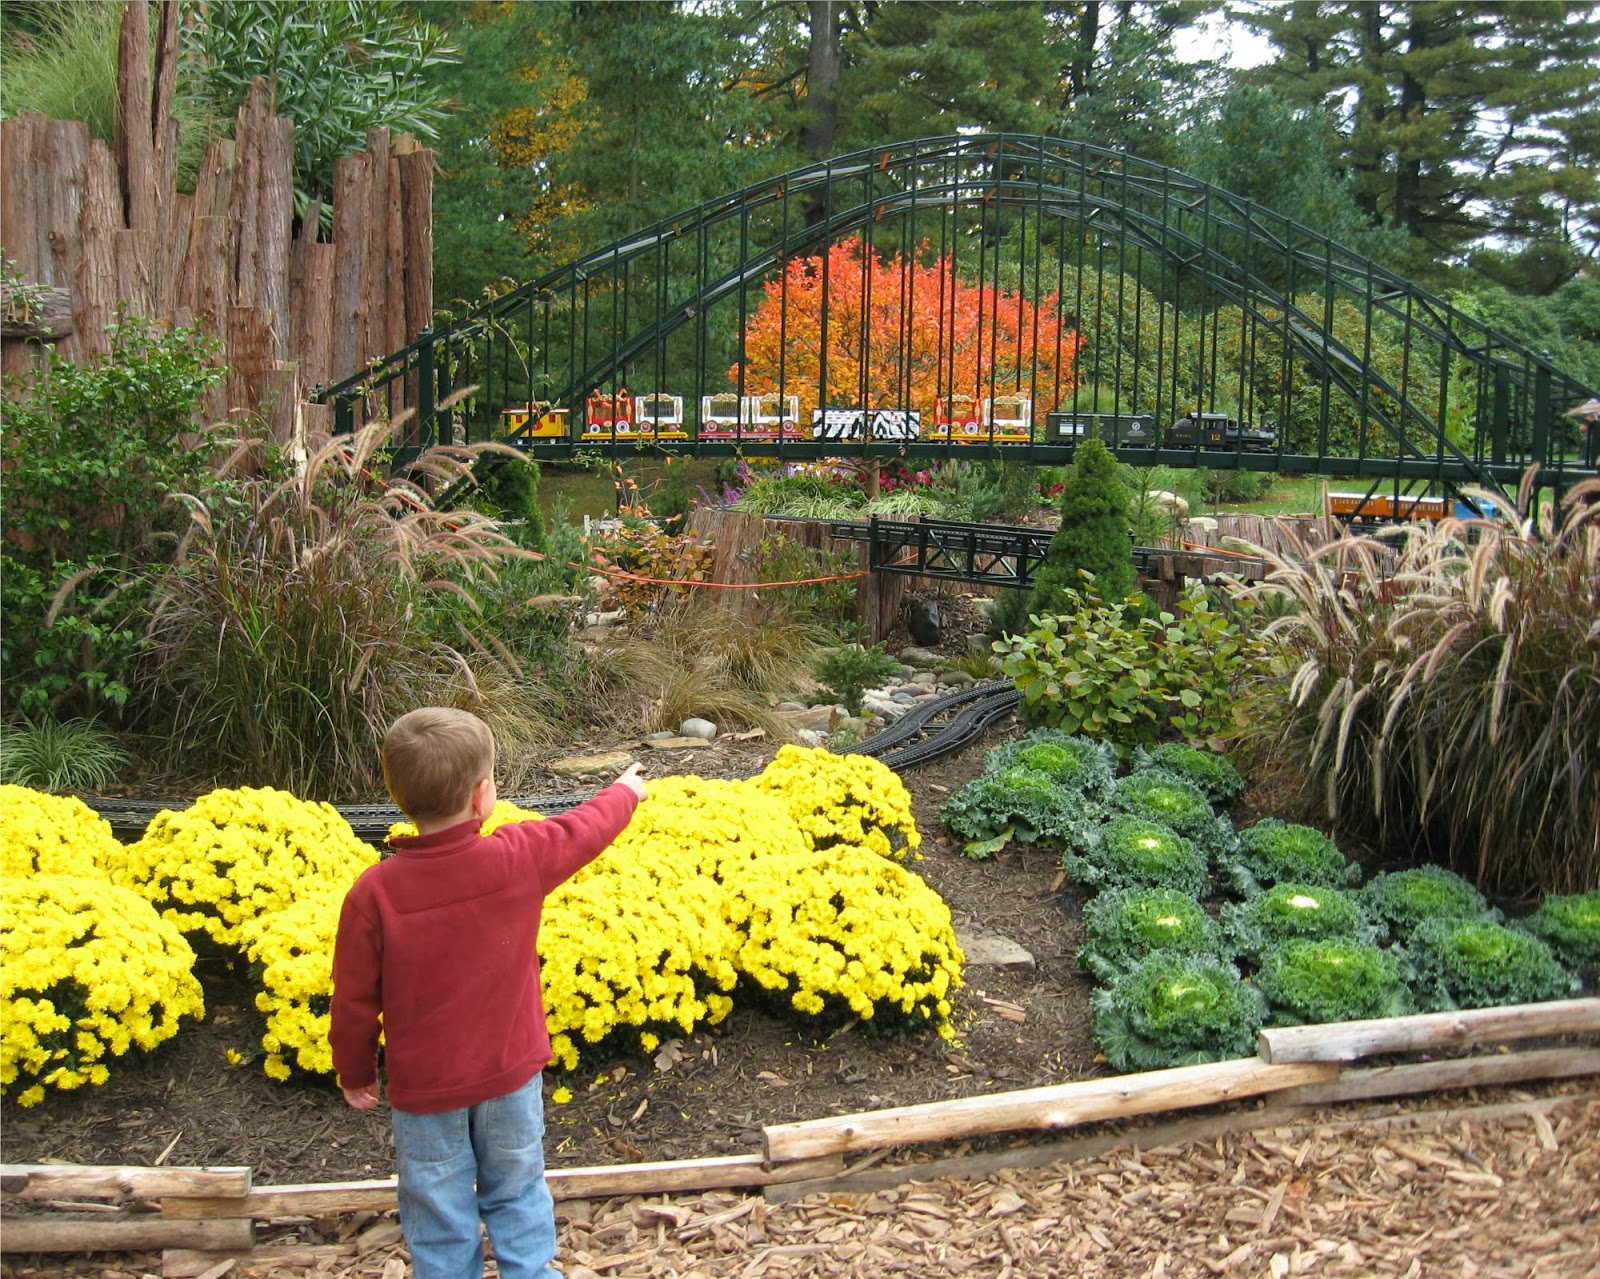
 The kids enjoyed the outdoor train garden.


There was something about this garden that made me think of the ocean...
wild but beautiful.


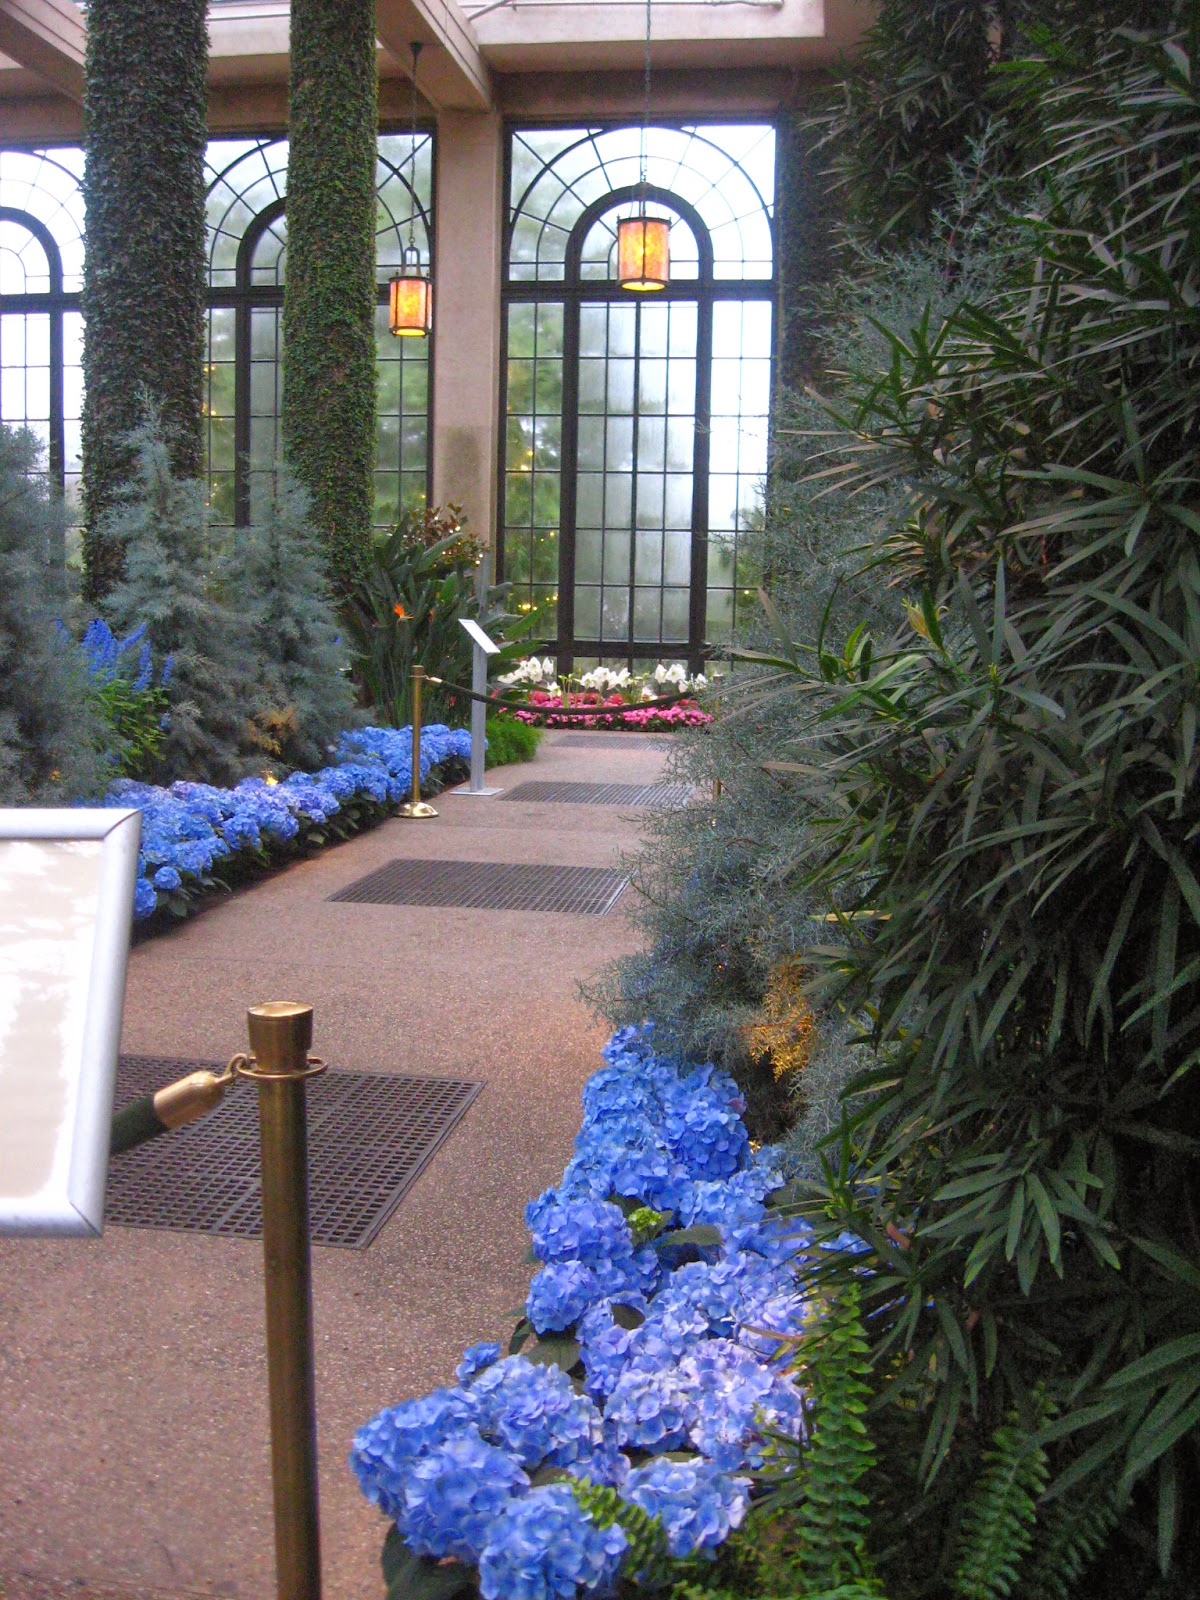
 There is a grand conservatory for viewing spectacular indoor gardens.


Of course, the flowers change during the different seasons.


 For example, this was in the middle corridor in the fall.
The flooring is covered with water and visitors can walk around it.


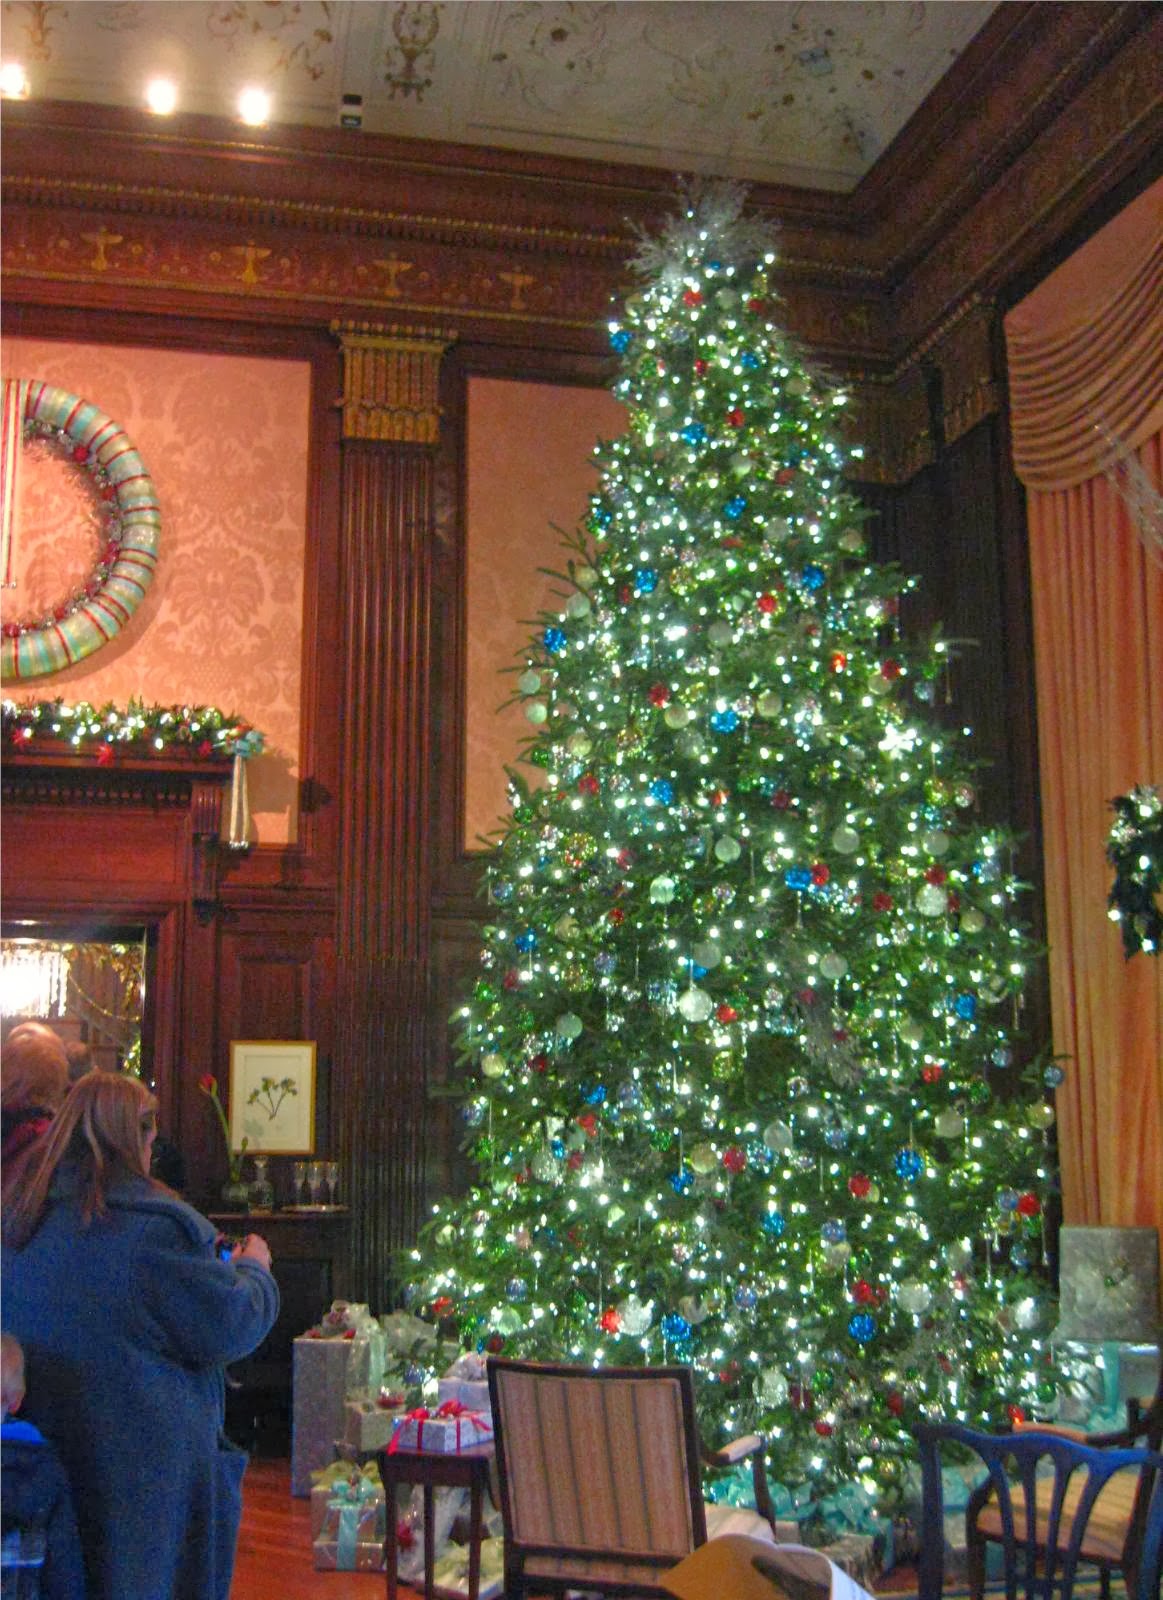
 This was the same corridor at Christmas time.


 The grand Christmas display looks all ready for a fine Christmas feast.


Doesn't this area look like a medieval castle?


At Christmas there was a grand tree in the side room.


An indoor waterway garden spans the center of the main building.


 Off to one wing, a children's garden is full of fountain fun:
 

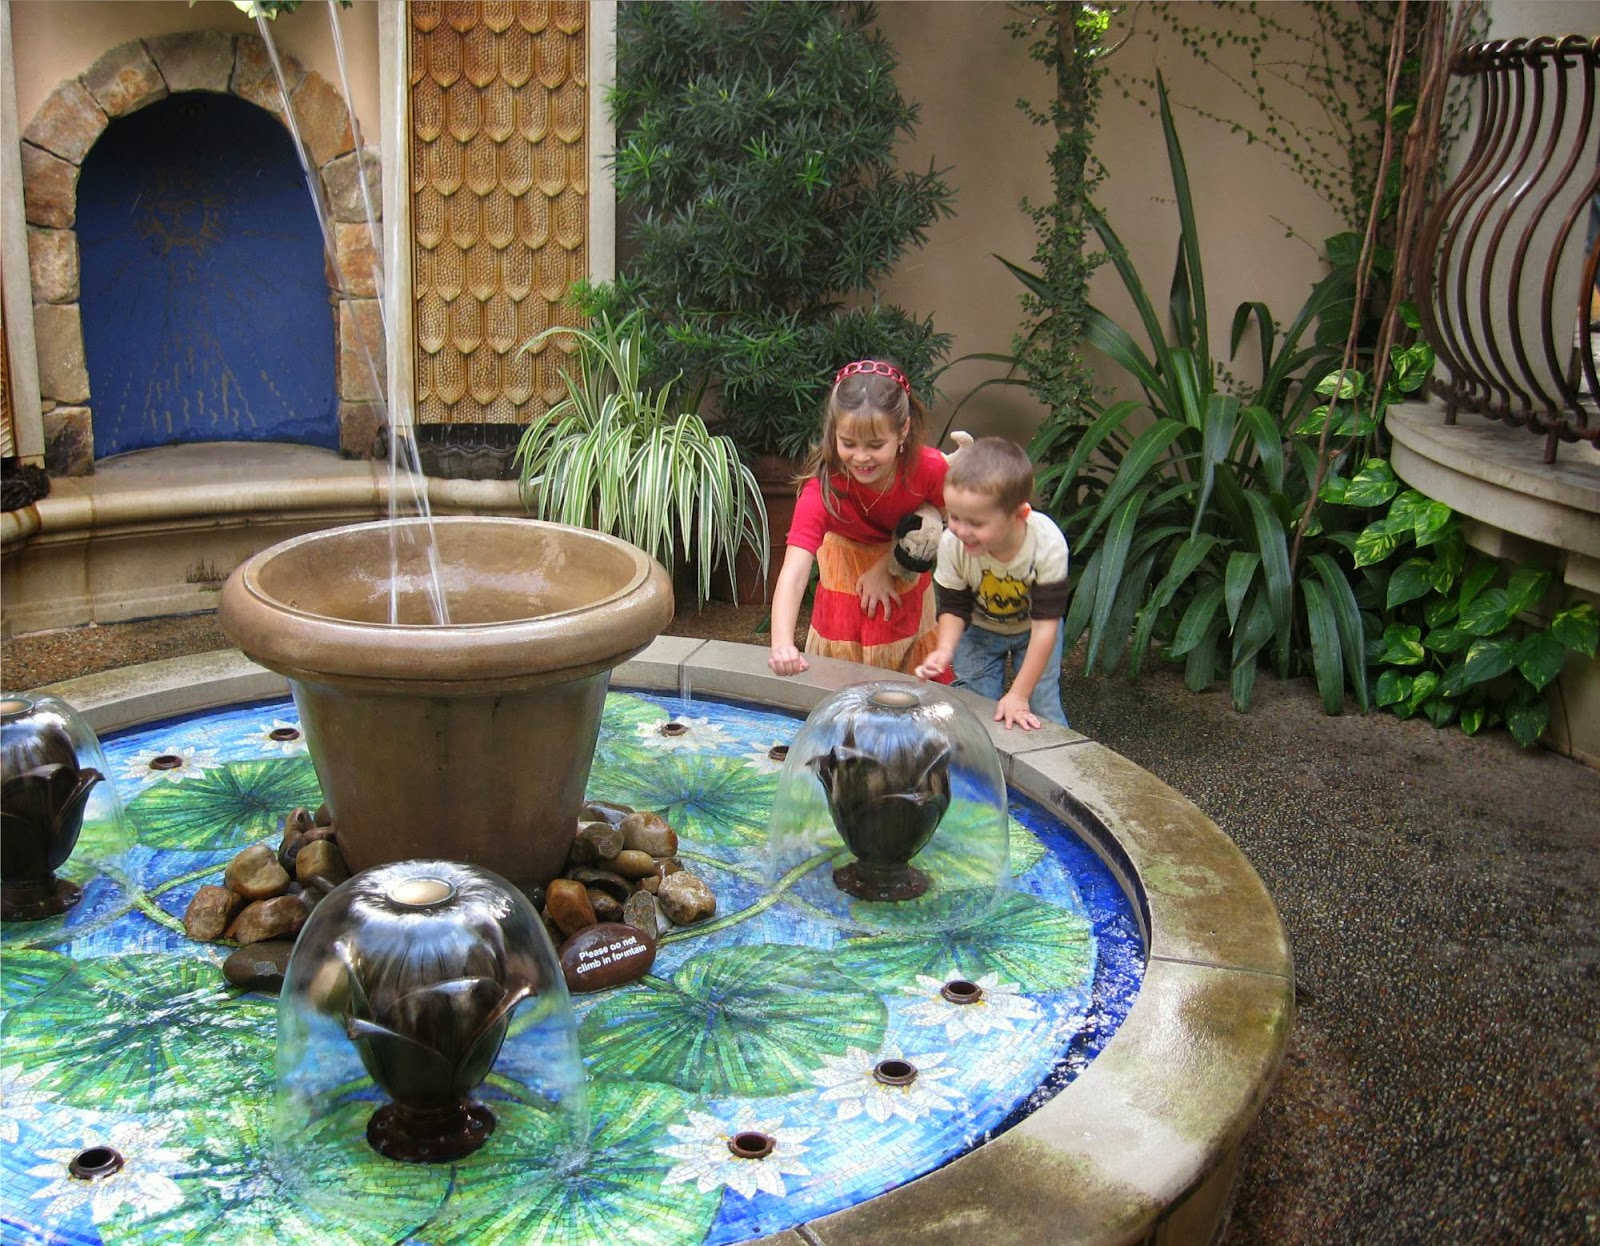
the kids enjoyed trying to catch the unpredictable spurts of water


and wandering through the child-centered displays.


 Different displays and moods are created with different flowers and foliage.


 My son was excited when we found the pitcher plant, sundew plants, and venus fly trap garden.


 During the Christmas display, ornaments, stars, and lights were everywhere...


even in the rose room.


Of course, Christmas tree displays made of every assortment were magnificent as well.


In one of the houses at the gardens, there was an intricate display in miniature.


Doesn't every girl dream of having a dollhouse with this kind of detail?


 The outside gardens were more enjoyable during our fall visit,
not so cold for walking.

The kids loved the tree houses...


 as well as the hike through the meadow.


 I was disappointed these Italian gardens with fountains were turned off for the season.


 but they were still beautiful.


One of my favorite parts of the day was the extensive walking we did,
the peaceful beauty of God's creation all around.


 We ended the day watching the musical water fountain.


At Christmas, we viewed the musical water garden in the dark,
and it was magical.


I am so thankful these gardens have been maintained and preserved for present day enjoyment.
(Thank you also to my sister-in-law and brother-in-law and family for the tickets for the visits.  How fantastic!)

If you ever have the chance to visit, dress for walking and you will have a memorable day of vacation.

(If I get the chance to visit again, I will take my better camera and know the pictures will be that much better...and this is just a sampling of the gardens.  There is so much more there to see.
Also, if you happen to eat at the dining area, the cream of mushroom soup is just incredible!)
If you would like to read the history of the gardens, you can enjoy that aspect of it at this link: 


Thanks for stopping by.


Wednesday, February 26, 2014

Art Lesson: Painting Vines, Leaves, Flowers on Furniture.


Hello!

Last time I showed how I got the veneer surface off this piece of furniture.

Today for the art lesson, I am going to show a simple vine, leaf, flower combination I have painted on tables and chairs and other surfaces that I have sold.


Each person has their own style and ability, so I am sure there is a million ways to do this.

Here is how I went about it.


First I measured the top of the surface I was painting.
 
This, generally speaking, is the hardest part for me,
trying to figure out exactly how many inches to put in each section so it is even.
Eventually, it gets figured and I step back and look at it to make sure it looks like it is supposed to.

I used chalk to lightly draw the lines.


 Once I had the lines right, I started laying down the Frog tape.

(Frog tape works great because it makes a very clear edge without bleeding
and without pulling up the paint underneath).

I find this can be tricky because there are two sides to a line so one has to either lay the tape right down the center line or choose one of the sides to lay it on.

When chosing a side to lay the tape on,
there are points the will have to be adjusted,
such as the smaller squares on the inside of the larger ones here.

I just add a slight layer of thickness because I felt the squares would look slightly off if I laid the tape right down the middle.

Of course, there is probably some mathematical way to fix this,
but I figured my vines and leaves once painted would hide any slight differences.


 I gathered the acrylic paints that I needed and mixed up some brown for the vines.


 For the vines, I begin painting "C" shapes and curly cues in a grouping.
I have found that less is better because if it seems empty later, more can be added.
Too much is harder to remedy.

 (Some of the vines are more red and some are more green, depending on how well I mixed the paint together, but I don't let that bother me too much...
I tell myself it looks more realistic if the vines have variation of color.

Please tell me I am not the only one who talks to themselves while painting.)

 Next I take a light green and randomly paint leaves along the vines.


 By the time I get the leaves done,
there are usually some dried ones to start with when I am ready to paint some flowers on.

For flowers, I start with a circle of dots for the petals.

Once the petals are dried, I go back and paint in the centers,
yellow or orange or a dirty yellow brown for some.


 To give the leaves dimension, I go back with a slightly darker color green and dab a little in the center or to one side of the leaf on some of the leaves.


I step back and look as I work, adding more vines, leaves, or flowers wherever I think some are needed until it looks done.


 After waiting twenty-four hours, I then take a rag and dampen it with stain.
With gloved hands, I wiped it onto the surface.  I then rubbed it around,
 being sure to cover the entire surface and edges,
and then wiped it off.

I sometimes use a brush, but this usually gives a much darker look to the stain,
and I wanted a very light look for this piece.


This piece is going to be used to hold all the videos and DVD's we have for the television.
 I love how they stack up so nicely on their sides and are easy to locate and to put back.


It is nice to see some progress in this room and this piece really gives some good storage and charm that the pressed board book shelf that was here before did not.


Here is a video of painting the vines, leaves, and flowers
if you are life me and enjoy watching things done
(Sorry about the jarring ending...I am still trying to figure out the videoing on my camera).


Thank you for stopping by and I hope you have some fun renewing a piece of furniture or something creative for your home or room or wherever you are.


Sharing at these blog parties: