Showing posts with label animals. Show all posts

Wednesday, January 20, 2016

Art for the Kitchen: Woodburned Wooden Spoons


The kitchen holds so much of our lives:
cooking, eating, washing dishes, chatting and laughter, playing games, singing...

It makes sense to fill our kitchens with things that we love, don't you think?  Since I can't always find those quirky things I have a liking for, creating some becomes the only option.


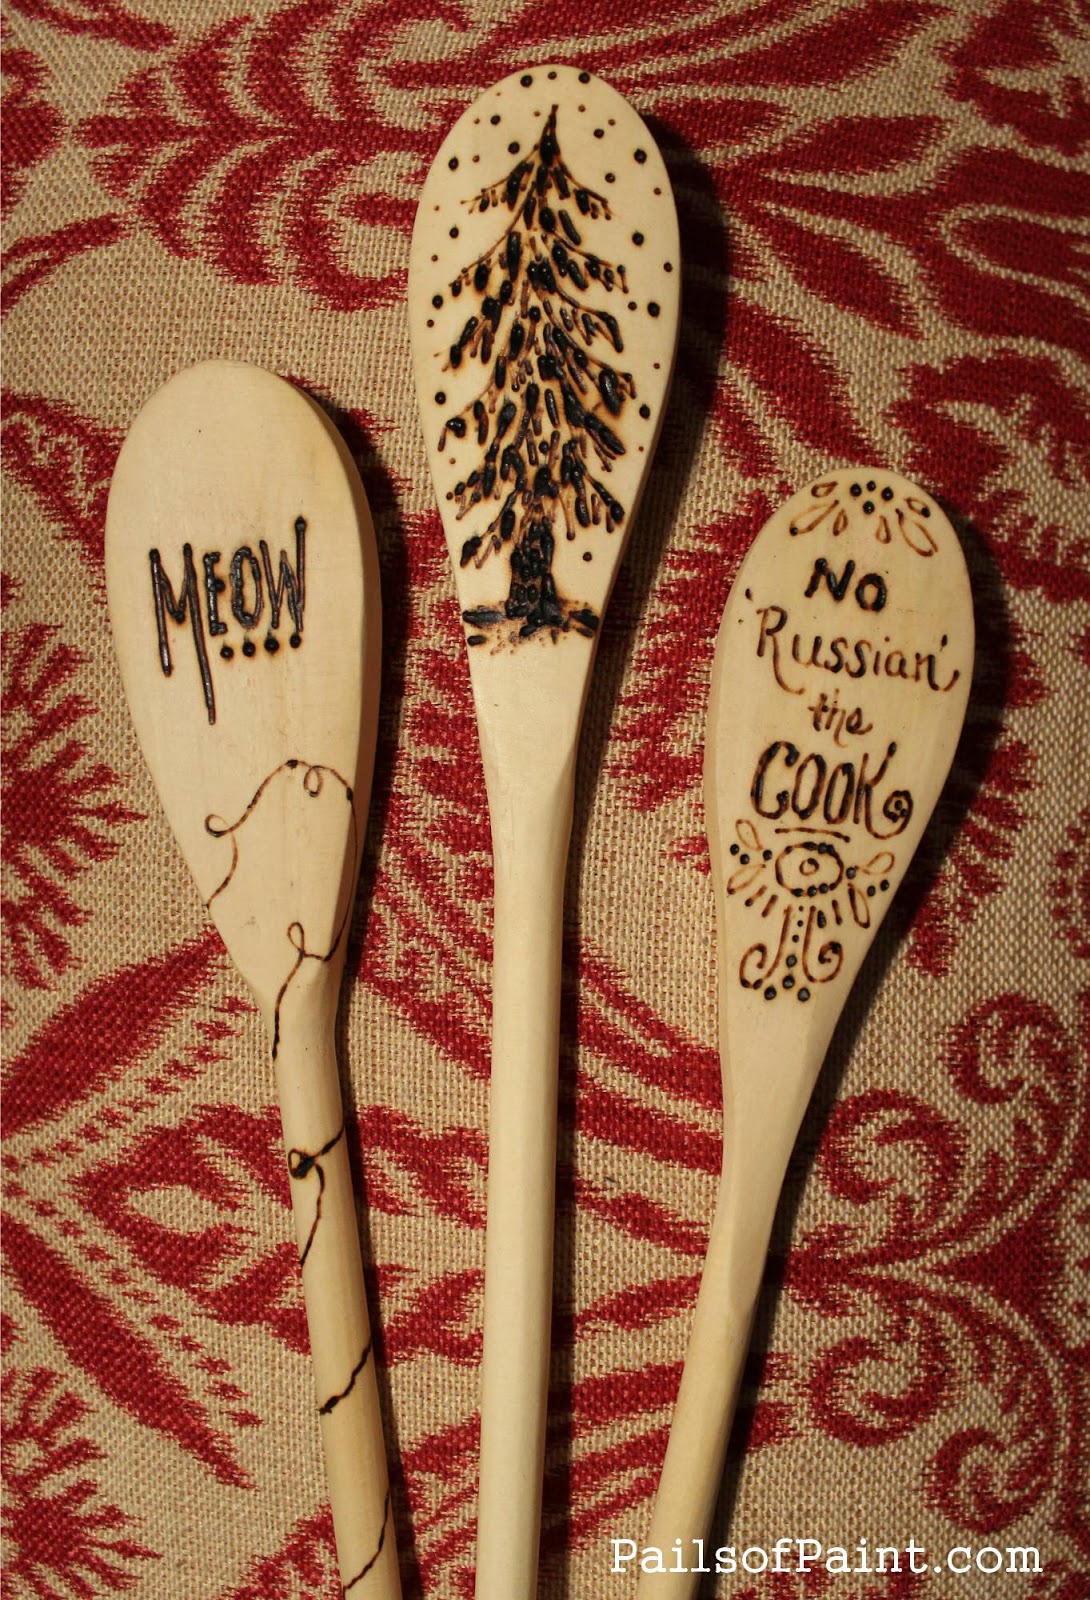
Having a Russian father, I have a special place in my heart for Russian nesting dolls (matryoshka dolls), which aren't always easy to find, so I decided to wood-burn one on my spoon..


Making Borscht will be extra fun now, I think.


Here is the process I use to go about wood-burning wooden spoons.

First I sketch the design I've chosen lightly with pencil.  I then begin wood-burning as if I was using a pen.  (There is not way to erase with a pen, so that is why it is more like drawing with a pen rather than a pencil.  There is no room for error so having a steady hand is necessary.)


Being careful 
1. not to let the wood-burner sit too long on any spot: this makes a deep, dark burn;
2. not to accidentally touch anywhere on the spoon with the tool where marks are not wanted because it can make marks rather quickly.
These are two tips that I had to learn the hard way.


When the burning is finished and you are satisfied with your burning, turn the wood-burning tool off and set it aside in a place where it can safely cool; it stays hot for a bit of time (and be sure to stop when you like it as it is: better to stop when it is satisfying than to continue and possibly make an un-fixable mistake).

Once you have made sure the spoon is also cooled, erase the pencil markings from the spoon.


Next I use coconut oil and rub it into the spoons.  I also have some beeswax around, so I rub in a small bit of that, too.  You just want to rub in an oil that wouldn't be harmful to eat as some will come off when you use it in cooking.  I have found rubbing coconut oil into my wooden spoons every few months helps to keep them from cracking.


The backs of the spoons are also fun to burn but be sure to do them before you rub the oil onto the spoon's front.


I enjoyed doing these spoons more than I expected, so I bought a selection at a kitchen store and burned them to sell at the Christmas craft sales.  These were fun to work on in the evening when the kids were in bed and I was sure to have quiet (and no bumping).


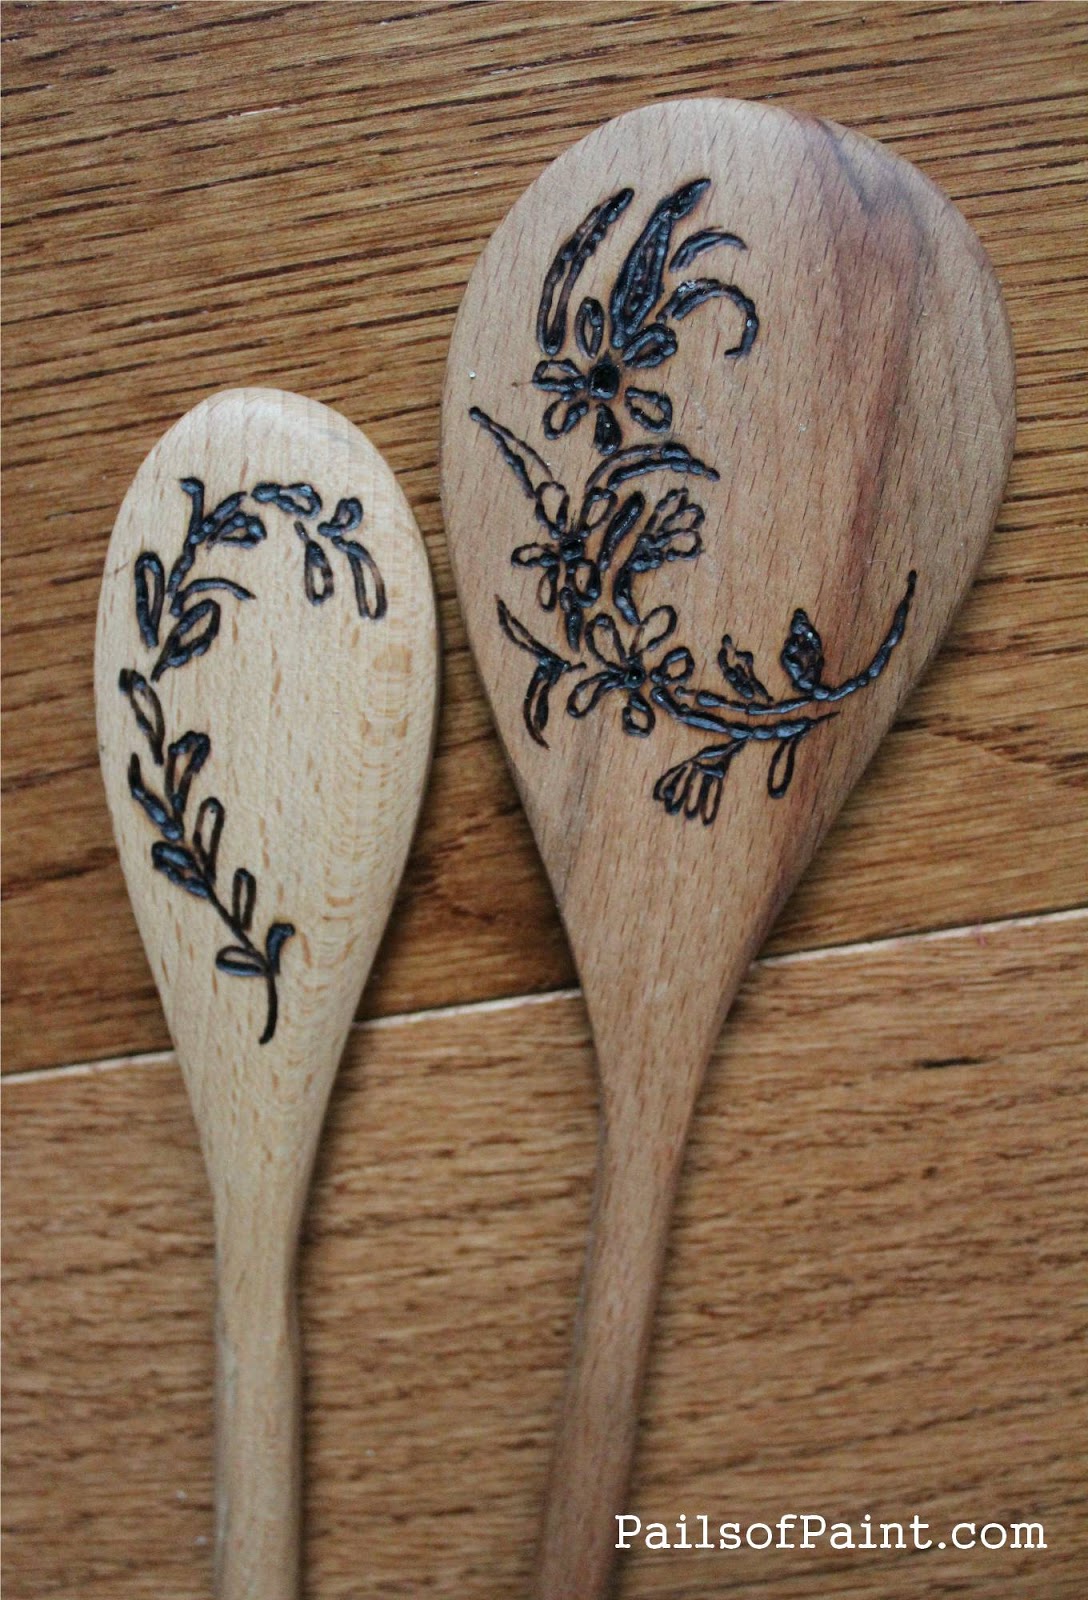
I got some ideas from Pinterest, some from calendars or cards, some from things I have enjoyed drawing before.  The scope of ideas is endless!


I think these chickens were from a design I saw on a piece of material; I liked their quaint simplicity.


 I did not sell all of the spoons, so some were great to give away in Christmas gift bags.


 I had fun making these and I'm sure you might, too!


Thanks for stopping by!


Saturday, April 4, 2015

Sketching Several Photos into One Piece of Art: the Farmer and the Horse.


  My house has been busy with several projects lately, and I thought I'd stop by to share one of them today.

   I was asked to do a piece for a lady that would be done in pencil.  Her husband has told their children stories about a farmer and his work horse and she wanted for me to create an image to remind them of those story times with him.  She wanted the man to be indistinguishable, as we all know how we form pictures in our heads when we hear stories, and she wanted each child to be able to keep their own ideas of what he looks like.

We looked up some images on Pinterest to try to get a working idea together, and I began to use these as basics of what to work toward.  (I will suggest if you like horses, type in 'work horse' or 'draft horse' on Pinterest...there are AMAZING pictures of them!)  I found several photos ideas for the farmer and the horse.

  I started by measuring out and drawing a box in the size that was wanted for the image to be.  This gave me guidelines of how large to make the sketches.


I spent a considerable amount of time sketching the images onto tracing paper.
(There were more eraser crumbs on that page than is probably legitimate for one piece of artwork!)
Often, I would stop and take a picture and then walk away, come back, and look at the picture in the camera.  Something about doing that makes me get a clearer perspective on it.
I could see in the image above that my horse's nose was off from what a work horse's nose should be.


In this sketch, I could see the horse's eye not right, and the man was a bit disproportionate as well.


I finally got a sketch I thought I could work with,
rubbed charchoal on the back lightly,
and then traced over the front drawing lines so the image would go onto my good paper.


I then began first with the eye of the horse.

When that was where and how I wanted it, I added some detail around it.


I did not mind that my horse was not exact. I wanted to take some artistic license as to the coloring and the angle that the horse would be approaching the farmer because I was using a few different photos to create the image I was trying to achieve.  The photos were just used as guides.


Here is a picture that shows you the light sketch that was transferred of the whole image.


I continued adding more details to the horse.


At this point, I realized I did not like what I was seeing in the nostril/chin/lower muzzle shape of the piece, so I set it aside to pick up for another day.

I will do the same now and will show the pictures/progress of that part in my next post.


Thank you for stopping by!


Thursday, June 12, 2014

Art Lesson: Shading Water with Watercolors.


Hello!


Today I am going to post a video I made a while ago and just never got it on the blog.
I was working with watercolors, a picture of a cat drinking from a pond
(it was actually something I was working on for a book I had written hoping to get published,
but have put that on the back burner for now while I am working on something more pressing).


The original picture of the cat had much more detail in the water of the sky and the trees overhead,
but I chose to just shade some of the ripples around the cat drinking and leave the rest whites and grays.


Here I will show you how I worked on shading the ripples.


 That is all I am going to share today.  I do hope to be back again really soon!


I hope this was helpful for somebody.
It is fun to work with watercolors and it seems that the more one works with them
the more confident and fun one can have with them.


Thanks for stopping by!


Thursday, May 22, 2014

Art Lesson: Watercolor Painted Vintage Wall Art


I was feeling the need to make my mantel sing of spring,
so I dug up these old wooden oval pieces I had once painted on and decided I did not like.
I decided to paint the edging of these ovals in black.


I found some vintage images on the Graphics Fairy of birds and printed them up in the center of each page by pasting them into Word and situating them to the size and place that I wanted them.


 (We've had a visiting blue jay to our yard in the last 2 weeks who is as blue of a blue jay I have ever seen).


I wanted to add a bit of color, so I splashed water all over the page with a paint brush
and then added some blue
and then some touches of red.


 Once that had settled into the paper a little bit,
I began painting the bird with a darker and less watered down blue.


 I filled in the leaves, branch, and flowers as well.


 Once the jay was done, I followed the same process for the Robin picture.


It is always a nice break to just paint an image that is already all drawn up for you.
Who doesn't love a bit of coloring-book style painting?


 I let these dry thoroughly and then cut them to fit into the oval shapes
(I did this by tracing the full oval shape onto the page and then cutting it down evenly on all sides until it fit, but a piece of tracing paper would also work to be more precise.
Laying it into the frame and running a pencil around the inside edge carefully should work).

Once I had them cut, I spread glue all over the backs of the images and then pasted them into the ovals, using paint containers to hold the image down on all the edges.


 Wanting a more vintage look, I heated some water and, using a damp teabag,
dabbed the warmed tea bag all over the image until it was stained as I wanted.
(This could also be done before gluing the image into the frame).


 The teabag was so used up, it cracked at bit and shed some bits of tea onto the images,
but I left them there to dry to add more character.


Once dried, I painted two coats of Mod Podge, allowing the first coat to dry completely before applying the second coat.
I then applied a squeeze of Martha Stewarts all purpose gloss paint from the bottle it comes in around the edges to make them look sealed in to the frame.  I used a paint brush to carefully brush it in and a few damp q-tips to clean up any smears.


Here they are all finished.  Can you see the difference with the Mod Podge?
The shine makes them look more like framed pictures.


I then put some frame wall hangers on the backs of the bird art
and hung them over the mantel in the living rooom


They added a touch of quaint, older looking decor to the wall with no expense at all:
I just recycled and used the supplies that I had...
aren't those the best kinds of projects?

Have you added any spring to your home this season?


I am still working on the bee picture.
It is coming along pretty well, but I am trying to wait until it is all finished before I share the processes I tried with it.

Thanks for stopping by!

Friday, March 28, 2014

Free Vintage Prints: Medieval Scenes.


Happy weekend!

I have not posted many vintage illustrations lately.
I am sorry about that.

I finally took some pictures from my late 1800's books
and decided I ought to get some on here.


My daughter has been studying the medieval times in history this year,
so these images stood out to me because of that,
I am sure.

However, don't we all find the age of knights and castles intriguing?


Here is the cleaned up image in black and white.


 Here it is antiqued.


This image of the girl out for a ride with the castle in the background was the only colored one in the book.


 I dulled the colors down a bit for this image:


 and here is the image antiqued.


If you would like to use these images,
they should, as far as I know, be free from copyright since they are from very old books.


To print them up in Word, click on the image, right click,
and then click on "copy",

open up Microsoft Word and right click on the screen,

and then click "paste",

it should paste the image onto the page.


If you have difficulties or suggestions,
please let me know.

Sharing at:
Betweennapsontheporch.net
Theprairiehomestead.com

Wednesday, March 26, 2014

Art Lesson - Sketch Page: Little Mouse


Hello!

I have been dieting the last month and a half,
a challenge between a couple of people and I,
It was a pretty focused endeavor.


My husband's boss and the secretary at his job are very thoughtful people
and often send home little treats to the kids or myself.

About a week or so ago, the secretary sent home a piece of cake for me:
she told my husband to have me wait until the kids were in bed,
and enjoy the cake all by myself.
Of course, she didn't know of my diet competition:
it was a sweet and kind gesture.

The cake was the most incredible-looking chocolate cake I have ever seen:
rich, dark frosting covered in mini chocolate chips,
drizzled with a bit of butterscotch.

The kids were all as desirous of it as I was.

Of course, I did what any good dieting mother would do:
I put it into a container and buried it in the freezer where it would be safe and sound until the competition was over, and I could enjoy it then.

The competition ended the day before yesterday,
and I waited a whole day before I dug the cake from the freezer.

I am being very good about it and only ate a section of it,
gave a few small bites to the kids,
and have the rest saved for another day...
after the incredible taste of it,
I am thinking that will be tomorrow.
:)


All that to say, I purposed to make a nice card for the thoughtful secretary
for such an incredibly delicious cake.


I decided to add a bit of something cute to the card,
so I decided on a little mouse to be in the picture.

A great tool for digging up realistic pictures of creatures is,
of course, the internet.


I typed in "cute  mouse" in the search engine,
and these are some of the images that popped up:


Using a combination of the images,
I came up with a sketch page to get myself familiar with this creature.


 I then sketched a picture of a mouse with some cake,
and then copied my sketch (using the light box) onto another page.

I am glad that I did because I used watercolors and did not like the way a few parts of the picture came out, so I used my original and the light box again, and am coloring it in this time with copic markers and colored pencils.


I haven't finished it yet, but here is the image of the mouse in watercolors.


I wish I could share a bit of the cake with you...
INCREDIBLE!


Feel free to print up the mouse page and give him a try,
if you'd like.  He is free for personal use, just not for resale.


Thanks for stopping in!


(To copy these pages, click on the image, right click, and then click on "copy".

Open up Microsoft Word and right click on the screen, and then click "paste".
 The image should paste onto the page.

You can then click "print".
If you have difficulties or suggestions, please let me know.)


Wednesday, February 19, 2014

Art Lesson: Shading Choices


Hello, friends.


How does a person make artwork look realistic?

Once the sketch is made on the page and the proportions are correct,
shading is an important part of bringing a picture to life.


With pencil drawing, shading is achieved through darker pencil marks in the areas that are shaded.
(Using lines drawn in the correct direction, thickness, and length is essential as well).


Shading a picture of color can be achieved through a few different methods.

Using different colors can give the shaded look, as in this colored pencil drawing below.


Layering color is also a good way to create shading.

Layering works especially well with acrylic paints, as with the hand in the duckling picture below.


As I have worked with watercolors, I have found that layering has a different response with watercolors.

Colors in watercolor tend to wash up when too much play is done to the paint on the paper.

This means that one has to see the different shades of color in the picture and apply them carefully.


The black keys of this piano were made without black paint, but with a mixture of blue, yellow, and red.  They were painted with three or four layers until they were dark enough.  As I applied each layer, I did so with minimal strokes, just enough to set the paint on the keys, and move it around to cover the keys.


To get more distinctiveness in the painting,
I decided to used mixed media in it.


Here are the keys with just the watercolor paint.


 Here are the keys as I started to add colored pencil to the dried painting.


 To give the wood more of a grain look, the pencil was used on it as well.


 Areas that needed even darker shading are easier to manipulate with the colored pencil.


 These are just a few ideas of different ways to approach shading in art.

If you have any helpful tips or ideas, I would love to hear them.


Thanks for stopping by!