For today's lesson, I thought I would show you a painted project with some tips along the way.
I had a little wooden sign that I picked up.
I sanded it down a little bit and then measured it for the image I wanted to put on.
I added the word "freedom" to the banner I found at the Graphics Fairy using Word.
Then I printed up the banner and colored charcoal pencil on the back of it.
I cut the image just a bit smaller than the board size so that I could see to place it centered on the board and then taped it down.
I then traced over the image with a pen on the top side, causing the image to pass onto the board
(I did not need to trace over the lettering and fine detail at this time: just the outline of it).
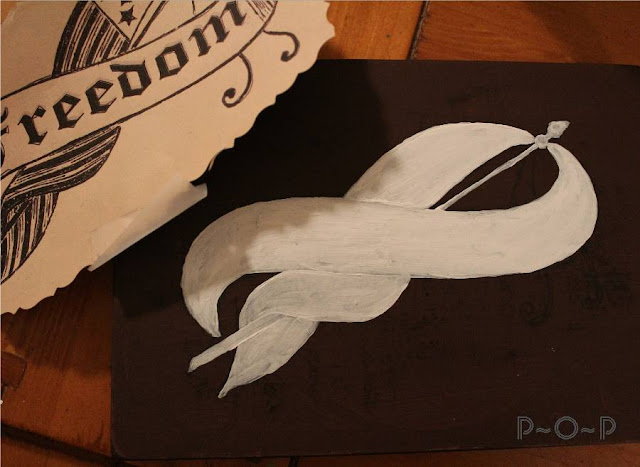
After I took the paper off, I painted the whole image white.
The reason I did this was because, it being on a dark background,
if I just painted the colors that I am going to use directly onto it, they would not be as vibrant as I want.
I will show you what I mean.
First though, let me show you that after the white paint dried (and I did two coats of it),
I cut the paper banner out exactly on the outside edge of it and then colored the charcoal pencil on the back of it again. I carefully taped it onto the dried painted white banner.
I then traced the top side of the graphic so that the detail was now on the white painted banner.
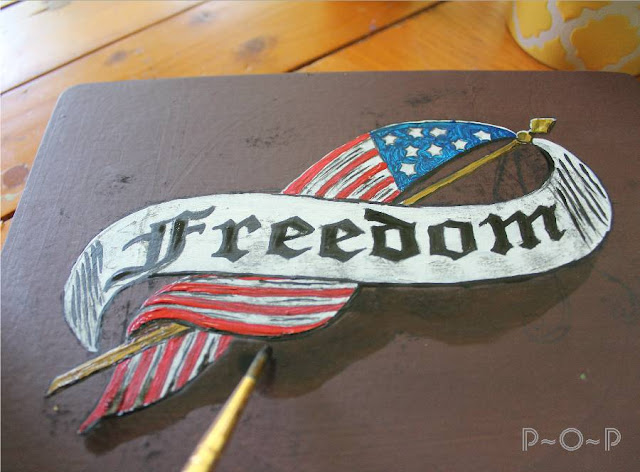
After carefully removing the taped banner, I began painting the colors using one of my favorite small paintbrushes.
(Do you find you tend to have a few favorites?)
See how bright and crisp the colors show up on the white?
For the flag pole, I decided to mix some yellow with gold to give it a slightly shiny look.
(Please excuse my paint pallet: the bottom casing from my frog tape.
I tend to use what is in my supplies and this does make a handy plate of paint.)
I used this gold/yellow also on the circles border I put around the edge, mixing in just a touch of black on those to give them some dimension.
I outlined a few parts of the banner with some black,
mostly on the lower parts of the graphic to look like shadowing and to help define it from the brown background.
I also added some water to some black and painted a smeared black background in around the banner.
While this dried, I added the gold strings handing from the flagpole and let them dry.
I wanted to make the blue in this image pop more because I love blue canning jars and thought this would look pretty displayed with some, so I added some water to my blue to make a blue background over the top of the dried black one.
This is where the difference can be seen between the blue on the white background of the banner and the blue on the dark background. The blue on the white is bold whereas on the dark background, it is muted.
I painted a coat of this watered down blue and then while it was still wet,
I painted a thin line of black around the outside edge of the blue background,
blending it with a slight circle motion slightly into the blue.
I felt it still needed just a touch more of blue, so I dipped my paintbrush in it
and swiped a few more bold blue strokes across the background.
After the whole thing dried well, I wiped off any excess charcoal markings and slightly sanded the wood to give it an antiqued look,
finishing it with a brown stain wax.
It is just a small decoration, but it will work well for the 4th of July as well,
and being small, it is easy to store.
Have you painted anything lately?
Paint is such a different medium to use after so much of the colored pencils and markers I have used lately,
but it is a fun change.
Thank you for stopping by!


BEAUTIFUL JOB!!!!!!!! :) I LOVE how this looks Antique!!!!!!!!! :)THANKS for sharing!!!!!!! :)
ReplyDeleteYour painted wood sign turned out great and it's also so creative! I recently purchased a pack of 5 x 7 inch canvas boards at a craft store (40% off coupon, of course). I'm thinking this project would also work well on a canvas board after painting and distressing a bit for the right texture. Thanks so much for the instructions and the inspiration!
ReplyDelete