Showing posts with label yellow. Show all posts

Friday, August 30, 2013

Using Art for a Clean House: Chore Chart


Today I am going to switch my usual vintage illustration post with a home project
because I wanted to join in Kelly's Korner blog and share a post on "cleaning tips."


Trying to keep the house clean with three little kids on a farm can often seem overwhelming.  I quickly realized that a great way to try to keep up with the house
is to encourage a bit of help from the little folks themselves.


Last year, I created some images to use to make chores more fun for the kids
and easier for those who aren't reading yet to see what everyone is supposed to do.

I affixed the images to used canning jar lids and put magnets on the back.
We used an old tray to put them all on.
At the end of the day, the kids got "tickets", little colored papers, that they could save up to use in the 'Attic Store.'  The 'Attic Store' is a space we cleared out in the attic and have some odds and ends I have picked up on sale, at the second hand store, and at yard sales: games, art supplies, hair things, little toys, videos, etc.  Each item had been priced 25 - 100 tickets or so, depending on the child who they were intended for and how many jobs they were expected to do (otherwise, my youngest would take a year to be able to purchase her items).  On occasion, we would change the target goal to a breakfast out with dad or some other fun adventure.

Before Christmas, I can change the tickets to money rewards so they can save up for some Christmas shopping.

Here are the images I made for their jobs
(yes, there are some that are not really "jobs", like reading some of the Bible everyday,
but it is a good habit that will help them through life, so I made it as well.  Certain of their jobs are much harder than others, but I figured the easy job tickets make up for the harder ones,
and they knew that they had to do certain jobs in order to get any tickets each day,
like making their beds: that had to be done or no tickets would be rewarded.)


The kindness award was given when I saw somebody doing something that I thought was especially kind.


 I need to made a few more to add to this list: my daughter occasionally helps with hanging/taking in laundry, helping with lunch, and I want to add watering the house plants to somebody's job list.

Here are some colorized versions I made using Copic markers,
 but kids could color their own in as well.


 Some of the jobs are seasonal, like the hauling wood happens more in the fall and winter.
Helping with plants happens mostly in the spring.


Vacuuming and the stairs are done on Saturday morning, and only one room is necessary at this point.

If they want extra tickets, they can do additional work at their choosing,
and mom is always happy to give them extra tickets!


This year I changed up the structure of our chore chart. 


I shrunk the images down when I copied and pasted them into Word
and copied, pasted, and cropped a few extras of the jobs I needed for more than one child.

I cut them and then put them into contact paper.
I got some velcro tape at the dollar store and put one section of that on the backs of each chore.

For the chore chart board, I painted the middle section of an old cupboard door using Annie Sloan's Chalk Paint in Ambusson blue,
 which can be used like a chalkboard. 


I painted the edges in a cheerful yellow.
Color is always fun on a chore chart.


 I put the other part of the velcro tape down the front side of the painted board,
and will put each child's name on the left side of the tape.

On the right side, I will use chalk board pens
to create a graph for the days of the week so that those lines won't have to be written in every week
but they can be washed off when I need to alter something.
(These look like chalk marks but stay on well unless washed with water).

The chart is leaning up against the wall in the living room that is painted in chalkboard paint
so it will be easy for them to mark an "x" on the chart when they complete their jobs.


 I put another strip along the bottom to hold the extra chores.


It is always fun to have a new chore chart at the beginning of a new year.

I found this system to be very effective, jobs getting done everyday without my even having to ask.
It's amazing what just walking by a straightened boot box will do to a room...
especially when I don't have to ask anybody to do it.

But even better is the sense of responsibility and help the kids get from being a part of keeping the house running smoothlly.


You are free to use the chore pictures I have made if you'd like,
as long as they are not for resale.


If you would like me to create certain chore pictures for you,
just leave a comment and I will post those here as I finish them.

Have a great weekend and thanks for stopping by!


Linking up to:

Wednesday, August 14, 2013

Art Lesson: Painting the Hand that Holds the Golden Duckling.


Hello, again!

This week, I decided it was time to finish my duckling picture
which I am painting on a recycled kitchen cabinet door
(I have had a couple of people give them to me when they came across used wooden ones that were unwanted).


I will be honest and admit that finishing this painting meant fixing that hand,
and painting hands is not something that I find to be easy.

I wish I had a bit more Jesse Wilcox Smith in me.


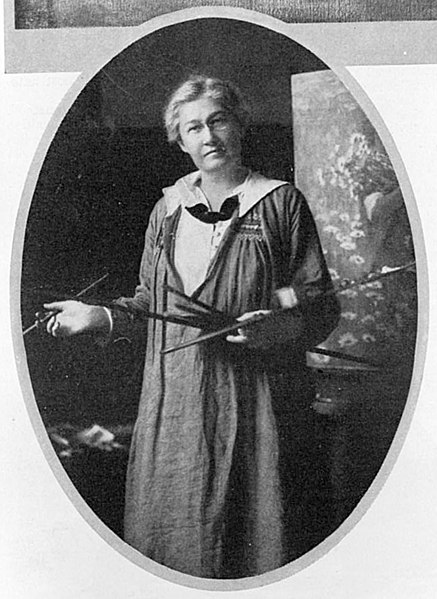
Jesse Wilcox Smith was an American illustrator born in Philadelphia in 1863.
Unlike many who pick up the pencil in childhood and sketch throughout youth, Jesse discovered in her early twenties that she enjoyed drawing and after studying under another great American illustrator, Howard Pyle, went on to illustrate for numerous magazines including over 200 covers for Good Housekeeping magazine.

Jesse was shy and lived with three (and then two when one left to be married), other young women artist.  They had a 50' by 50' studio built over the top of a barn and lived in the nearby carriage house.
Despite the fact that she never married or had children, she is well-known for her images of mothers with children and was recruited by many to illustrate their children.

She used a variety of techniques: charcoal, oils, watercolors, varnishes.
  

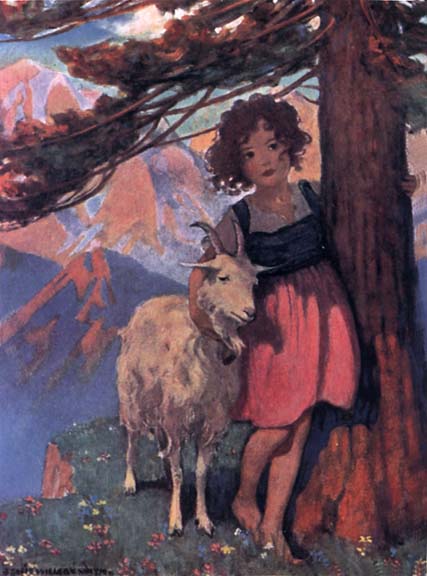
You will likely recognize her work:
This is the image from A Child's Garden of Verses by Robert Louis Stevenson.


and this is the image she created for the book Heidi by Johanna Spyri.

(There are hundreds of other wonderful illustrations you can see by looking up Jesse Wilcox Smith.)


One thing Jesse is known for is her great ability to draw "hands."

I am not so skillful in the subject.

Skin is a colorful thing.

We may think of it as being generic in it's coloring,
but really, most skin colors have many colors in them.


I received this art catalog this week in the mail,
where I buy my copic markers and prismacolor pencils.
I noticed the painted woman's face on the front cover:
 look at all the colors in it.


 The catalog is in my hand right now, and it is actually more of a bluish tint, that greenish color around the nose, but there is green in there, too, yellow, pinks, browns, tans, whites, red, grays...
what color isn't in skin?


The way that light falls on skin can determine the colors in it.
Whether the hand is holding something can alter the coloring as well.

Notice the shading here?
The light is hitting the painted hand holding the duckling from the above left.
The light is hitting my hand directly straight down onto the side we see.

Can you see the difference in the coloring because of the shading?


To get warmed up with the paints, I decided to improve a few things in the duckling that I saw were wrong: the size of his eye, the coloring around his eye, and some of the softness in the shading of the feathers.


 Once I had finished up and felt more prepared to paint the hand, I looked at it and tried to decipher the colors in it
(minus the marker and paint stains on the actual picture of my daughter's hand).


When I looked at the hand, I decided to start at the lightest sections and work down from there.


I put a fresh layer of paint on
and then worked down into the reddish-orange shaded area...


 adding shading into the pointer finger as well.


I think part of the mark of being an artist is wearing some of the paint, don't you think?

My finger's always end up getting their fair share,
as using my finger to dab and mix in colors to blend seems to be a habit.


 Of course, constantly looking back and forth to the picture and identifying features that need more shading or distinctive colors made me fall into working on the two fingers from the other hand,
and I just kept working on areas that looked like they weren't quite right yet.


The painted fingernail got a bit of shading.

I used just a touch of blue along the lower edge of the hand and blended it well with the black.
It seemed to soften the dark edge with a bit of blue in it.


 I finished up by adding some crease lines along the lower finger and a few barely visible light lines of creasing where the wrist meets the arm.


 I set the picture down and walked away for a few minutes.

I find it always helps to set it down when I think I am done and come back with fresh eyes.
I can pick out areas that need touching up
like lightening the lower line of the hand in places to make it look more gentle
and fixing duckling tail feathers that weren't quite long enough.


At this point, I decide that I am done.
The hand is not perfect but I am happy with it as it is far better than other hands I have done,
and I feel like if I play with the paints any more, I may ruin the contentment I have for it right now.


 I finished a bit later with a slight background of the duck house wall.


It will brighten this wall in the bathroom until we take our things in to the fair in a couple of weeks.


What about you?  Have you ever painted a hand
or had fun noticing the hues of the skin?

Take a chance to notice this week and challenge your artful endeavors.

Thanks again for stopping by!

Wednesday, July 24, 2013

Art Lesson: Using Q-tips to Paint Flowers.


Hey, there!
Welcome back.
 

I promised I would explain the simple process I used to add these Black Eyed Susans to my plant cart.

You could use this process for several different kinds of flowers like daisies or cone flowers...


but I chose the Black Eyed Susan because I love its simplicity and cheerfulness.


The household item I used to paint the flowers was Q-tips.
(I don't recommend using the generic brand of Q-tips.  The cotton is not as full or tightly compacted on the ends
and painting with them could prove disappointing.
Honestly, this is a guess on my part.
I just know that is how I feel about using them for their actual purpose.)

I used a couple of them with a color on each end,
but a color on each Q-tip is also a good choice if you don't want to be so careful not to get paint on yourself.

I seem to get paint on me no matter what I use, so I decided to just go ahead and use a different color on each end.

I used acrylic paints.


Starting with yellow, I dabbed the paint on and then made simple strokes to start each petal.


I went back on each petal and made a second stroke to make the petals a bit wider.


Using brown on the other end, I swirled a circle of it inside the petals.


Using a light yellow green, I then dipped another Q-tip...


and poked it into the brown, blending it a bit and then poking directly down into it to make a more spotted-looking middle.


Using another side of a Q-tip, I mixed a bit of the yellow and red to make yellowish orange
(I do generally try to keep my paints separate, but I had used the green for another project and made a mess of it, so I just used the palette as it was.
You, of course, are surely much neater, so please pretend this sea of green is not here).


I used the yellowish orange I'd mixed to dab on the yellow petals in areas where I wanted a bit more shading,
mostly in the center of the flowers.
(Do you see how it looks a bit more orange inside the real flower?)


I then set the orange Q-tip down and picked the yellow one back up.


I used the yellow to move the orange around some,
 to blend it.


Repeating these steps, I made more flowers, sometimes skipping the brown center to make a bud that was not fully opened.


Once there were enough flowers on the cart, I picked up a tiny brush and added stems and leaves.


Once everything was dried, I waited a day so the paint would be thoroughly sealed,
and I then applied a coat of Fiddes and Sons rugger brown wax to give it a slight antiqued look.


Q-tips made painting these flower petals easy, the cotton creating a texture that mimicked the flowers well for this simple crafting purpose.


Have you ever used a Q-tip or other household item to get a certain look in a painting?
I'd love to hear that I'm not the only one raiding the cupboards all in the name of art.


Thanks for stopping by and have a great rest of the week!


Sharing at these blog parties:
Funkyjunkinteriors.net 
Nominimalisthere.blogspot.com
 Redflycreations.com 
504main.com 
Shabbynest.blogspot.com 
Craftberrybush.com
Theshabbycreekcottage.com
Redflycreations.com 
504main.com 
Shabbynest.blogspot.com 
Craftberrybush.com 
Raisinghomemakers.com
Embracingchange.com
Mockingbirdhillcottage.com


Tuesday, July 9, 2013

Yellow Paint on the Porch


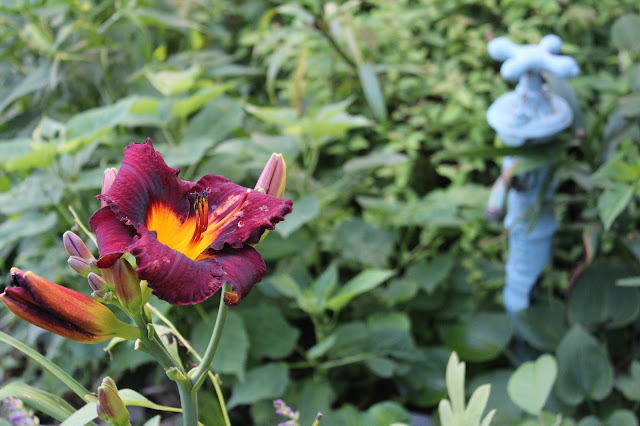
The Daylilies are boasting beautiful colors lately,


so I thought the porch could use a bit of color as well.

The milk jug had been painted a while back using an image from the Graphics Fairy's website
and the charcoal transfer method.


I added some Plaster of Paris to a small can of yellow paint the I had on the shelf
and applied it to the recycled pink metal watering can.
Adding Plaster of Paris seems to give the paint a good grip on most surfaces.
A potted flower inserted in the top has a small dish inside to keep the water from rusting out the watering can.

I then painted an old bucket in the same color.


Sometimes a bit of a left-over pail of paint can add a fun change to a summer porch.


Happy day to you and thanks for stopping by!


Linking up to these fun blog parties:
Marvelouslymessy.com 
Momstheword 
Homemakeronadime 
Bystephanielynn.com 
Keepingitsimplecrafts.com