
Hello!
Here is a quick art lesson for children or adults who
would like some quick tips on drawing the eye.
Let's begin.
The eye is such a beautiful window to the person inside.

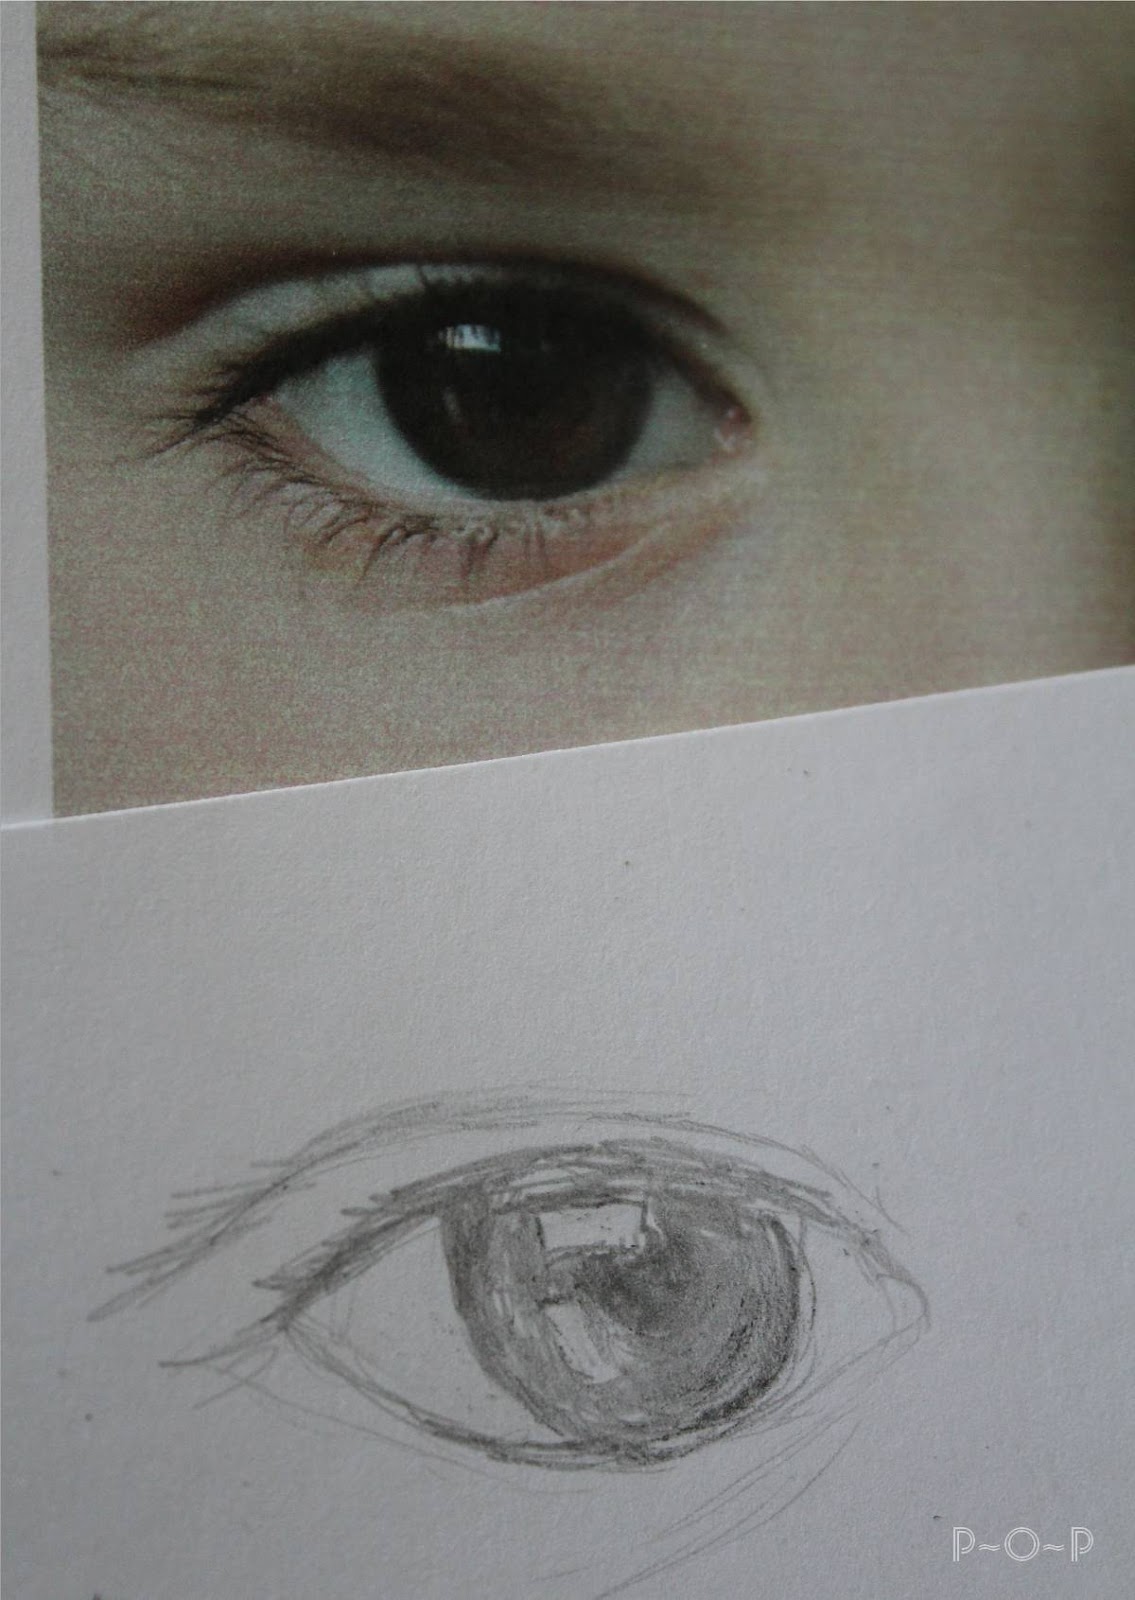
Find an eye you'd like to try.
(I took a picture of my son for this lesson).
Starting with the shape of the eye:
hold your pencil in the air and trace around the eye, not touching the paper,
but loosely make the shape it makes,
just so you get the feel of the shape that the eye is.
Drawing in the air may look strange, but you'll see it is very helpful.
Sometimes I do it right in the middle of when I am drawing when I feel stuck on a certain part.
Drawing in the air may look strange, but you'll see it is very helpful.
Sometimes I do it right in the middle of when I am drawing when I feel stuck on a certain part.

Sketch the eye onto your paper until you get the correct shapes and lines.
(Sometimes it helps to squint at the picture to better see the shapes.
Try it on the eye above.
Can you see the different outlines of the shapes more clearly?)
Try it on the eye above.
Can you see the different outlines of the shapes more clearly?)

Once you have the starting lines and shapes,
mark in the place in the eye where the white is
(the light reflecting in the eye).
It can be bigger than the actual light reflection in the picture.
When you fill in the eye, it is better to have more white and fill some of it in
than to not have enough and have to try to erase it
because erasing doesn't leave the white as bright.
Next mark in where the pupil, the little black circle in the middle of the eye, is.
(Sometimes this is harder to see, but if you can see it, mark it in)

Once you have the main parts of the eye sketched in
you can start shading the eye.
I started with the top eyelash line,
but this is up to you.
Start wherever you feel would be a fun place to start.
I started with the top eyelash line,
but this is up to you.
Start wherever you feel would be a fun place to start.

Keep shading.
A good thing to remember when shading a round object like an eye
is to try to draw the
A good thing to remember when shading a round object like an eye
is to try to draw the
Here's a tip. If you feel frustrated or restless,
get up and take a little 30 second walk around the room.
Wiggle your fingers. Touch your toes.
But make sure it is only for 30 seconds.
But make sure it is only for 30 seconds.
It is best not to stop drawing at this point if you can help it.
Sticking with a sketch is good because you are using a part of your brain
that is the artistic part. It takes a little bit of effort to use this part of the brain
but it is worth it.
Sometimes, a little walk or a stretch of the arms over the head
is helpful in relieving tightness you may feel from concentrating or if your fingers get tight.
I always try to work in 15-30 minute segments, at the least.
This will help train your brain and help you feel like you are getting something accomplished.

Remember, practice makes perfect.
Nobody gets everything perfect, especially the first handful of times,
sometimes two handfuls.
Sketches are great at getting you started on the right track.
Draw your sister's eye today,
your friend's eye tomorrow.
Draw an eye in a magazine.
Just keep sketching, and soon enough,
you'll have drawn an eye that you will feel happy to say,
"Look at what I drew."
This is part of my free art lesson series each week.
To see the full list of art lessons, click <HERE<.
Linking up to:
Hiphomeschoolmoms.com
Bedifferentactnormal.com
Keepingitsimplecrafts.com
Homemakeronadime.com
The-sunday-showcase-party: Under+The+Table+and+Dreaming
Madincrafts.com
Iheartnaptime Keepingitsimplecrafts.com
Homemakeronadime.com
The-sunday-showcase-party: Under+The+Table+and+Dreaming
Madincrafts.com
Raisinghomemakers.com
Coastalcharm
Thriftydecorchick.blogspot.com
Cozylittlehouse.com
Diyshowoff.com
Funkyjunkinteriors.net
Frenchcountrycottage: Feathered-nest-Friday
Kellyskornerblog.com
Nominimalisthere
Gnowfglins.com
Raisingmightyarrows
Savvysouthernstyle.net: Wow-us-Wednesdays
Coastalcharm.blogspot.com
Abowlfulloflemons.net
Betweennapsontheporch: Metamorphosis Monday
Thededicatedhouse.blogspot.com:Make-it-pretty-Monday
Postds like this make me wish I had at least one tiny, artsy bone in my body. Beautiful! Cheryl Pitt - Titus 2:1 Conference Team
ReplyDeleteThanks so much for your comment...the very first on my blog! You made me smile...and I'm sure there must be one artsy bone in there, for sure! :)
DeleteThis is just wonderful. I sent link to my niece and I am going to pin. More of this please.
ReplyDeleteOh, how encouraging you are! Thank you for your kind words. I will be posting on some more art tips soon.
DeleteLearning to draw is on my to-do list and this fits right in. Thank you!
ReplyDeleteThank you, Susan. This blog is helping me work on my drawing skills, which is on my to-do list, so hopefully we'll both benefit from it. :)
DeleteThanks for sharing. I love to draw. you can find some on my blog page but I have never been able to do eyes so I am glad I came across this. Come visit me sometime!
ReplyDeleteThank you, Lisa. And thank you for being one of my first followers, too. :)
DeleteThis is fabulous. I am loving these tips. I use the squinting method, but I did not know to add the light first. That really makes sense!
ReplyDeleteThank you so much!
hugs x
Crystelle
Crystelle Boutique
Thank you! Fabulous is a great compliment!!! Glad to be of help and hope you have a fabulous day!!!
DeleteWhat a great art lesson - thank you! Found you through Between Naps On The Porch.
ReplyDeleteThank you, Susan. BNOTP is a great meeting place! Love visiting there!!
DeleteI see you are new and so I will follow, good post and great tips.
ReplyDeleteJanice
Thank you so much! Thank you for the kind words. Have a great week!
Deletewow! that´s really beautiful and great instructions :)
ReplyDeleteLove this step by step. Doing it!
ReplyDeleteI found you from Thrifty Decor Chick. Your instructions are wonderful! I think I might really be able to do this. Any suggestions for supplies - paper and sketching pencils - that will make my efforts look great?
ReplyDeleteI love this tutorial! I have been trying to learn to draw and paint faces in fits and bursts. lol When I'm not painting furniture. I'm a new follower. I would love for you to share with my readers at Transformed Tuesday. http://pjhdesignsoneofakind.blogspot.com/2013/04/transformed-tuesday-32-features.html
ReplyDeleteHope you have time to stop by and looking forward to more post like this one.
Hugs,
Peggy~PJH Designs
Thanks so much for this tutorial. My girls have been trying to draw faces for their homeschool co-op art class and this should really help.
ReplyDeleteI came here from your link on Raising Homemakers.
Thanks!