
Hello.
Today I am going to show you a trick my art teacher taught to us that I have found helpful on so many occasions.

Our ducklings began hatching out today, and I took some sweet pictures of the fluffy guys.
I decided I wanted to use one of the pictures I took to make a painted piece for our bathroom
since I have a couple of ducks in it as a slight decor theme.
I also possibly wanted to create some cards with the image.
A helpful way to work on an image before sketching it onto the final piece is to sketch it onto tracing paper.
This allows most of the sketching, erasing, proportioning to be worked on until the desired look is achieved.
There are tricks to getting these elements.

This is a sketch I did on tracing paper a while back.
I used a grid on my tracing paper and created the same grid on the picture that I had photocopied and enlarged.
I was able to check out my proportions based on what was in each square of the grid of the photo copy.
For my duckling picture, I decided to skip the grid and just sketch the image,
using my pencil to measure the the length of the hand and then the fingers.

I then used my pencil and measured up the length of the duckling's body and head,
compared to that of the hand and fingers.

From here, I began attempting to place the eye of the duckling, reworking the shape of the eye until I got what seemed right, as well as some of the shaded lines on the face and wing.

Whenever I felt stuck or confused about what was wrong with my sketch,
without actually touching it, I ran my pencil over the image on the photo on the area I was trying to draw
to capture the shape/angles of the area I was trying to correctly see.
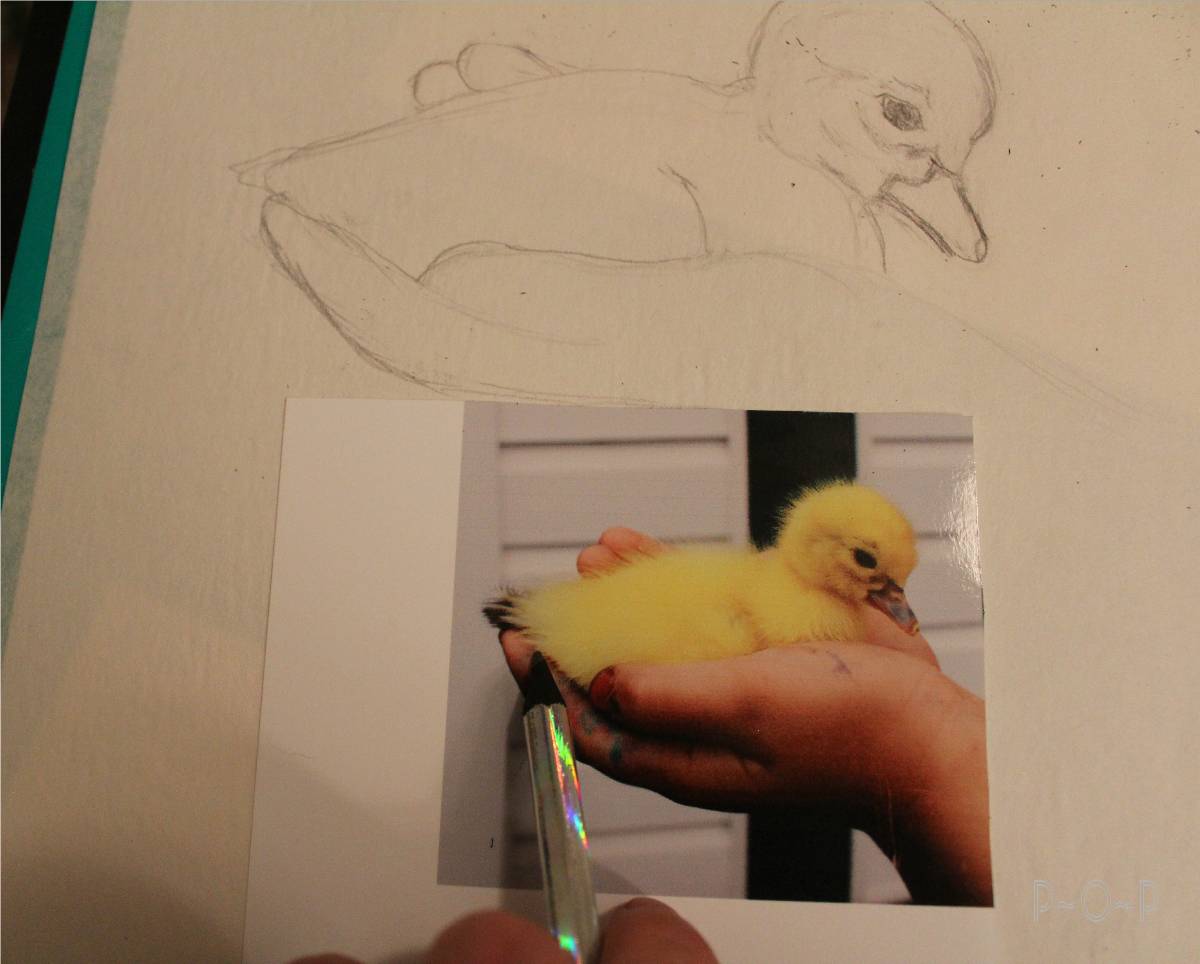
(Here I was running my pencil over the area of the tail and up and over the thumb.)
I set this image aside for now until I have a chance to work on it again later this week,
giving my brain a rest from it so that when I come back, I will see it with new eyes.
I find this helps me better see what areas of the image may be incorrect.
However, I will not do too much more detail,
perhaps just a bit more of the line detail in the fingers,
and then I will have my sketched image on the tracing paper.
All of my erasing and measuring marks will be on it instead of my final canvas.
I will be able to rub some softer pencil on the back of the image and then transfer the image lightly onto the final canvas, and be able to use that image again if I'd like to.
I will show you the details of this more clearly in a future lesson

Let me know if you have any questions or if something was not explained clearly.
(I had hoped to do more with this drawing, but the subject of this drawing swallowed up much of my time. Looking at them, though, can you blame me?
Watching them with their momma is hard to resist.)
Watching them with their momma is hard to resist.)
Until next time, thank you for stopping by!
Amazing sketches really loved it!sketched pictures
ReplyDelete